Entertainment
The greatest tips and tricks for Windows 11

If you take the leap and upgrade to Windows 11(Opens in a new tab), you’ll notice a slick redesign with a Chrome OS(Opens in a new tab)-like centered taskbar and rounded corners on apps. Under the hood, it’s largely the same OS, but there are some new features you should know how to use. These tips will ease the transition from Windows 10.
Take advantage of some new features in Windows 11 with these tips(Opens in a new tab), courtesy of PCMag’s Jason Cohen and Michael Muchmore.
Realign the Start Button

Credit: PCMag/Microsoft
The first thing that will jump out at you is the placement of the Start button(Opens in a new tab). Long located in the lower-left corner of the screen, it’s now centered with the rest of the icons on the taskbar. But don’t worry, you can change it back.
Right-click the taskbar and open Taskbar Settings. Select the Taskbar Behaviors drop-down and change Taskbar Alignment to Left.
Your taskbar icons move to the left and the Start button goes back where it belongs. For more on personalizing the Windows 11 taskbar, check out our guide(Opens in a new tab).
Add More Options to Your Right-Click Menu

Credit: PCMag/Microsoft
The right-click menu now focuses only on the most important settings. Should you need more settings—print, set a new background, or view the full file location, for instance — select Show more options to open a spill-over menu.
Customize the Quick Settings Panel

Credit: PCMag/Microsoft
Windows 11 separates the Quick Settings that appear in the Action Center in Windows 10 from that panel’s notifications. Click the area of the taskbar that has Wi-Fi, speaker, and, battery icons to open a settings menu that lets you control Wi-Fi, Bluetooth, airplane mode, battery-saver mode, and more. To add or remove settings buttons, click the pencil-shaped Edit quick settings button. Unpin what you don’t want or click Add to make new features accessible from the Quick Settings menu.
Create and Manage Multiple Desktops With Greater Ease

Credit: PCMag/Microsoft
Microsoft replaces the old Task View button with a redesigned icon on the taskbar, which makes it easier to create and manage multiple desktops(Opens in a new tab). Just hover over the icon to see any open virtual desktops or create a new desktop. These desktops can then be rearranged as needed, and apps that are in one desktop can be dragged into another.
Pro tip: You can use different wallpapers for each virtual desktop. Right-click on the desktop, choose Personalize, then Background, and choose a different image on each desktop. Not that this only works for the Background choice, not for Themes. If you choose a Theme, it applies to all virtual desktops; however, after applying a theme, you can change the background per desktop. When you do this, you see a cool cross-fade between the two backgrounds when switching.
Gather Your Widgets

Credit: PCMag/Microsoft
While Windows 10 dabbled in widgets, Windows 11 goes all in. If you want to check the weather, look up sports scores, track stock prices, watch nearby traffic, manage your Outlook calendar, cross tasks off your to-do list, or read the latest news, a new Widgets icon on the taskbar has you covered. You can customize the widgets(Opens in a new tab) to suit your needs, rearrange them on the page, and manage your newsfeed preferences(Opens in a new tab) through Microsoft News. In recent Windows 11 preview builds, third-party widgets make an appearance in the panel, including entries from Spotify and Facebook Messenger—they should be available in an update arriving soon.
Learn New Ways to Snap Your Window Layouts

Credit: PCMag/Microsoft
Microsoft has supported the snap and resize feature since Windows 7, but it gets a boost in Windows 11 with Snap Layouts(Opens in a new tab). You can still drag windows to the sides and corners for half- and quarter-screen layouts. Windows 11 adds a hover menu over the Maximize button that offers layout options—one large window on the left and two on top of each other on the right, or three in a row, for example. Your choices depend on the size of your display.
Click to select your preferred formation and then move your apps into place. You can turn this behavior off in Settings if you prefer, and some keyboard shortcuts let you quickly snap windows. For example, Windows Key-Left Arrow snaps a window to the left half of the screen.
Chat With Teams

Credit: PCMag/Microsoft
Microsoft Teams(Opens in a new tab), the company’s free messaging, calling, and videoconferencing app, is built into Windows 11(Opens in a new tab). Launch video calls and start chats from a new Chat icon on the taskbar with no need to open the Microsoft Teams app. You can sync your contacts through the Teams mobile app, but if your contacts don’t use Teams, you can send them invitations via email or text. You can also have SMS conversations with contacts even if they don’t sign up for Teams, and they can join a video chat from a web link.
Get Things Done With Focus Sessions

Credit: PCMag/Microsoft
With messages and video chats popping up throughout the workday, it’s easy to get distracted. Focus Sessions in Windows 11 encourages you to set aside time for work that requires uninterrupted deep focus. It’s currently available in the new Alarms & Clock app, and offers a quick way to get at least 30 minutes of distraction-free work time. If you go beyond 45 minutes, the app automatically schedules a five-minute break about midway through your session. Here’s a step-by-step guide(Opens in a new tab) on setting it up for your PC.
Add Tabs to File Explorer

Credit: PCMag/Microsoft
A top feature added in the Windows 11 22H2 update(Opens in a new tab) is that File Explorer finally gets tabs like its macOS counterpart Finder has had for years. Having tabs saves you from littering your desktop with multiple File Explorer windows when you need to view more than one at a time. Just right-click on a folder and choose Open in New Tab, like you would in a web browser.
Pro tip: You can drag a file between tabs. Just drag it to the desired tab and then down into the file list for that tab. Also as with a web browser, you can drag tabs sideways to rearrange them and hit Alt-Left Arrow to navigate back in a tab.
With the initial Windows 11 release, Microsoft streamlined the ribbon at the top of the File Explorer menu. Cut, Copy, Paste, Rename, Share, Delete, Sort, and View choices get prominent buttons at the top, saving you from having to wade through multiple menus you seldom use. Windows 11 also adds a New button for creating new folders and shortcuts, as well as documents based on the programs you have installed. The buttons displayed change based on context, too, so, for example, when you’re searching in the right-hand search box, you get a Search Options button.
Pair Input/Output Devices

Credit: PCMag/Microsoft
Windows 11 gets a full-featured Sound menu with the ability to pair new input and output devices.
Open Settings > System > Sound and click Add device under the Output section to link external speakers or other devices. Or click Add device under Input to connect an external microphone.
You then have a choice to connect via Bluetooth, wireless docks, and more. Scroll down to the Advanced section and click All sound devices to view a full list of all input and output devices that have been connected to your PC.
Listen With New Sound Modes

Credit: PCMag/Microsoft
You get extra control over your audio output in Windows 11, including mono audio and enhanced audio modes. To go mono, open Settings > System > Sound, then enable Mono audio to combine the left and right audio channels.
For enhanced audio — which includes bass boost, virtual surround, room correction, and loudness equalization — click All sound devices under the Advanced section of the Sound menu, choose a device to access the Properties menu, and enable Enhance audio.
View the App List

Credit: PCMag/Microsoft
Windows 11 adds an extra step to view your full list of installed apps. Instead of opening the Start menu and immediately seeing the App List next to your live tiles, you have to click the All Apps button in the Pinned section of the Start menu. You will then be able to browse the list or search for a specific app.
Pin Apps to the Start Menu

Credit: PCMag/Microsoft
Live Tiles are gone in Windows 11. In their place is a more simplistic Start menu where you can pin apps for easy access. Open the App List, right-click on an app, and select Pin to Start to move it to the Pinned section. Then drag the app into your preferred position. To remove apps, right-click and choose Unpin from Start.
A newer option that arrived in a Windows 11 update is the ability to drag icons on top of each other to create folders, as you would on a mobile operating system. You can also adjust the relative sizes of Pinned and Recommended icons.
Customize the Start Menu

Credit: PCMag/Microsoft
In Windows 10, the Settings button appears above the Start button when you tap it. Not so in Windows 11, but you can add it back(Opens in a new window)(Opens in a new tab) via Settings > Personalization > Start > Folders. Here, you can also add File Explorer, other common folders, and Network icons.
Get Better Recommendations

Credit: PCMag/Microsoft
The new Start menu has a Recommended section for recent files and frequently used apps. To customize what appears here, open Settings > Personalization > Start so you can tell Windows to stop showing recently installed apps, frequently used apps, or recently opened items in the Start menu, App List, and elsewhere.
Change Default Apps

Credit: PCMag/Microsoft
In Windows 10, it’s easy to choose a default app, but with Windows 11, the process is more complicated, as you need to specify a default app for every file type. Open the Settings app and tap on the Apps section in the left-hand menu. Choose Default apps, click on the app you want to set as the default for a file type, and you see a list of all file types that it’s capable of handling. Click on the file type you want, and select an app from the menu that pops up. For a full rundown of the process, check out our guide(Opens in a new tab).
This article originally appeared on PCMag.com(Opens in a new tab), Mashable’s sibling site. PCMag.com(Opens in a new tab) is a leading authority on technology, delivering Labs-based, independent reviews of the latest products and services.


Apple Watch Series 9 vs. SE: A smartwatch skeptic tested both for 13 days

Google dubs Epic’s demands from its antitrust win ‘unnecessary’ and ‘far beyond the scope’ of the verdict

Apple: pay attention to emerging markets, not falling China sales

Greatest Star Wars Day deals and new releases 2024: Shop May the 4th sales

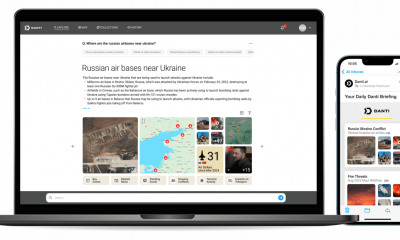
Danti’s natural language search engine for Earth data soars with $5M in new funding

5 essential gadgets for turning your home into a self-care sanctuary

Haun Ventures is riding the bitcoin high

Hands-on with the Claude AI app: It’s pleasant to use, but janky

Calendly revamps its browser extension as it seeks to do more than schedule meetings

How to unblock porn sites: Greatest VPN for porn in 2024

NASA discovered bacteria that wouldn’t die. Now it’s boosting sunscreen.

API startup Noname Security nears $500M deal to sell itself to Akamai

US think tank Heritage Foundation hit by cyberattack

How to watch ‘Argylle’: When and where is it streaming?

Tesla drops prices, Meta confirms Llama 3 release, and Apple allows emulators in the App Store

Meta to close Threads in Turkey to comply with injunction prohibiting data-sharing with Instagram

Tesla layoffs hit high performers, some departments slashed, sources say

Former top SpaceX exec Tom Ochinero sets up new VC firm, filings reveal

TechCrunch Mobility: Cruise robotaxis return and Ford’s BlueCruise comes under scrutiny

Consumer Financial Protection Bureau fines BloomTech for false claims
Apple Watch Series 9 vs. SE: A smartwatch skeptic tested both for 13 days
Google dubs Epic’s demands from its antitrust win ‘unnecessary’ and ‘far beyond the scope’ of the verdict
Apple: pay attention to emerging markets, not falling China sales
Greatest Star Wars Day deals and new releases 2024: Shop May the 4th sales
Danti’s natural language search engine for Earth data soars with $5M in new funding
5 essential gadgets for turning your home into a self-care sanctuary
Haun Ventures is riding the bitcoin high
Hands-on with the Claude AI app: It’s pleasant to use, but janky
Calendly revamps its browser extension as it seeks to do more than schedule meetings
How to unblock porn sites: Greatest VPN for porn in 2024
-

 Entertainment6 days ago
What’s on the far side of the moon? Not darkness.
-

 Business7 days ago
How Rubrik’s IPO paid off big for Greylock VC Asheem Chandna
-

 Business6 days ago
TikTok faces a ban in the US, Tesla profits drop and healthcare data leaks
-

 Business5 days ago
London’s first defense tech hackathon brings Ukraine war closer to the city’s startups
-

 Business7 days ago
Photo-sharing community EyeEm will license users’ photos to train AI if they don’t delete them
-

 Entertainment6 days ago
How to watch ‘The Idea of You’: Release date, streaming deals
-

 Entertainment5 days ago
Mark Zuckerberg has found a new sense of style. Why?
-

 Business5 days ago
Humanoid robots are learning to fall well